Fake WPS Office Launcher Spreading DDoS Botnet
2025-02-20
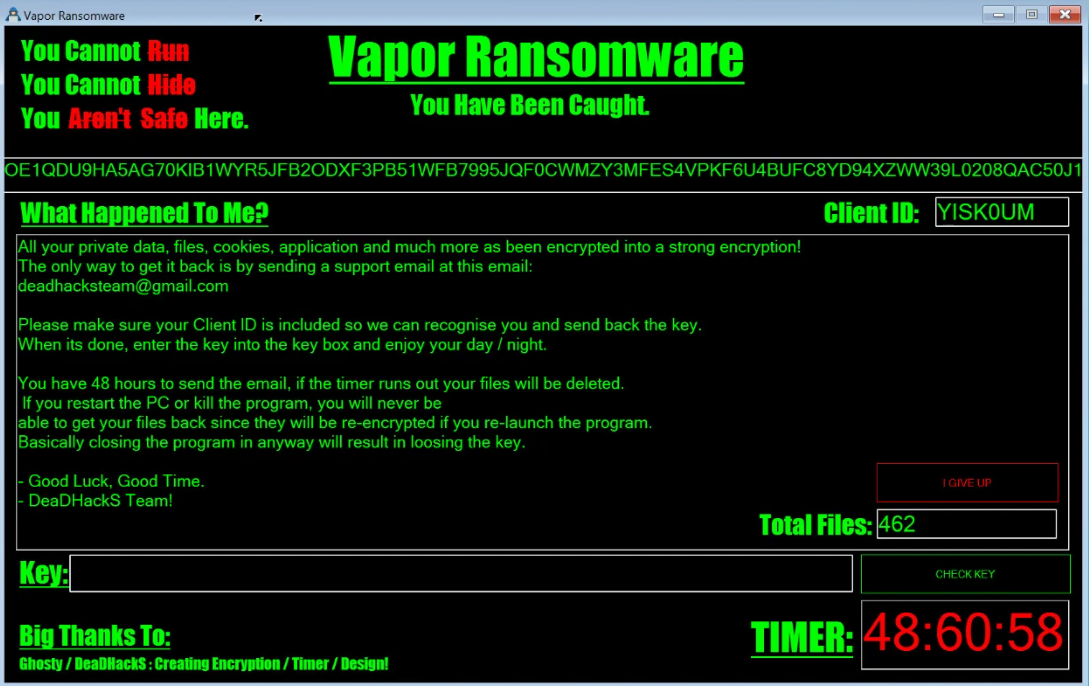
This blog offers a detailed analysis following my initial posts on X regarding a DDoS bot client disguised as a WPS Office launcher, specifically targeting Chinese users. The malware is designed exclusively for Distributed Denial of Service (DDoS) attacks. It supports various protocols, including raw socket, UDP, DNS, QQ, and HTTP. Protected by the ZProtector packer, the malware utilizes multiple techniques to escalate privileges, maintain persistence, and alter its file hash to evade detection. Detailed technical information will be provided throughout this blog.
1. The Indicators of Compromise (IOCs)
Malicious download link: http[:]//154[.]204[.]177[.]165/win47.zp.exe

MD5: d871b45a8b45abb7b1be9b16ea7c6d65
SHA-1: e8aed3ff353af65d24c6eaafd4faeeaaf8ed0fd1
SHA-256: 39e00e12074b826d689354e939a4c4ea8cee1a595f02e322d6c2f95f49da0011

Botnet controller: 154[.]204[.]177[.]165:2553

Persistence locations:
%SYSTEMROOT%\WindowsUpdata\<random_name>.exe
%APPDATA%\WindowsUpdata\<random_name>.exe
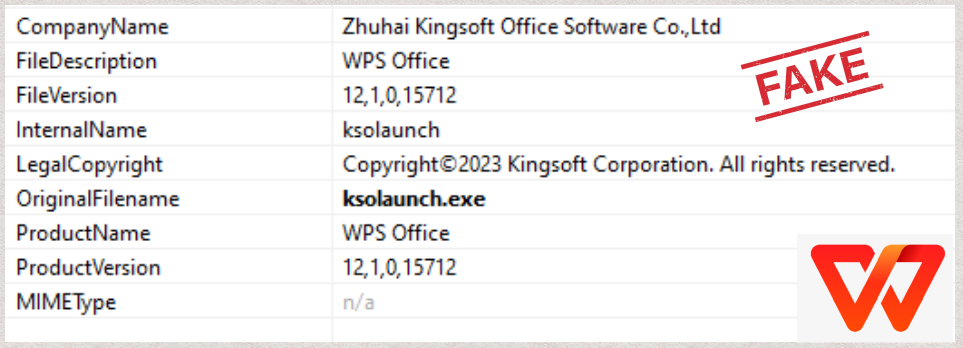
2. The Fake WPS Office Launcher
To trick the victims into running the malware, the program logo and version info of the sample pose as a WPS Office launcher:
The sample is packed with ZProtect, which conceals the malware code and complicates analysis. Although this blog does not focus on analyzing the packer, I will provide some signatures of ZProtect identified in this case:
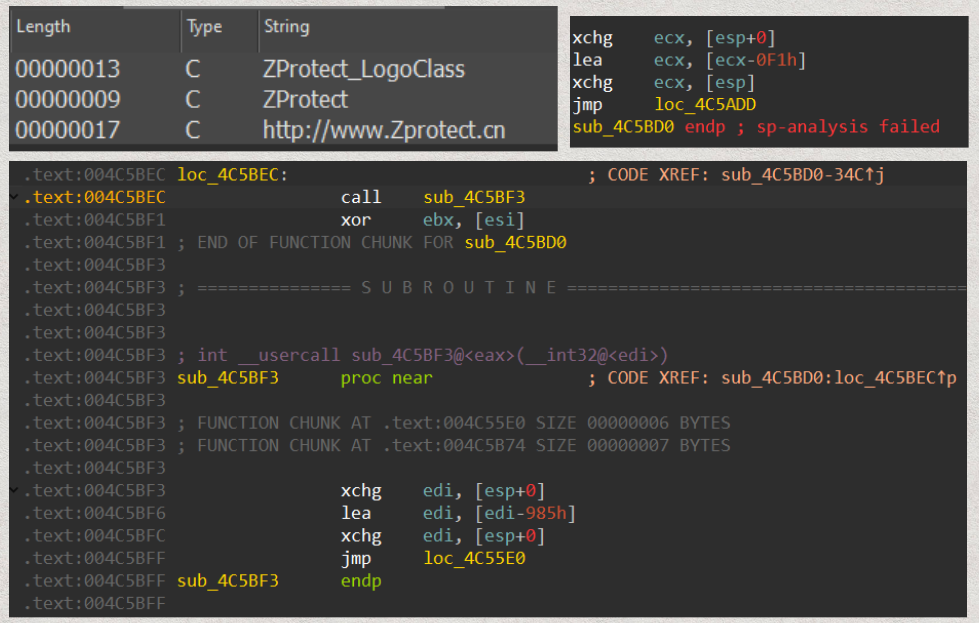
The remainder of this content will focus on the analysis of the unpacked sample.
3. Analysis Of The DDoS Bot Client
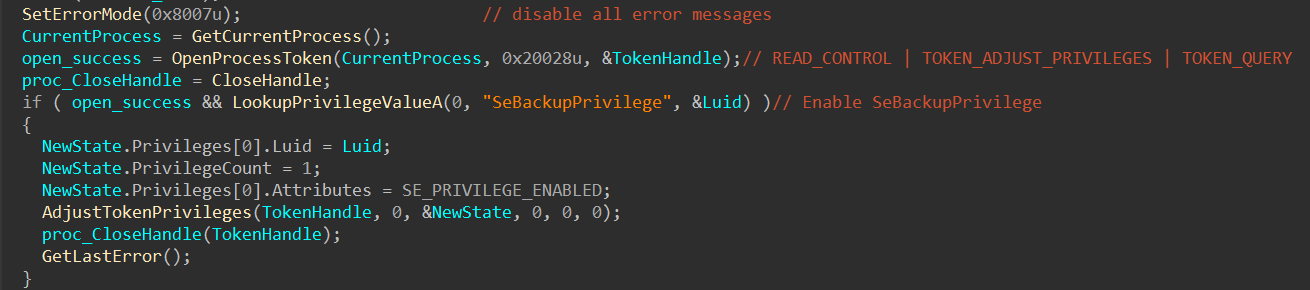
3.1 Initialization Steps
The process first disables all error messages and attempts to enable SeBackupPrivilege:
It also tries to disable User Account Control (UAC), as well as Limited User Account (LUA) and PromptOnSecureDesktop:

3.2 Persistence
The persistence path is set to %SYSTEMROOT% if the program has administrative privileges; otherwise, it defaults to %APPDATA%:

A random string consisting of characters from ‘a’ to ‘z’, with a length between 2 to 11 characters, will be used to construct the complete file path:
<persistence_path>\WindowsUpdata\<random_string>.exe
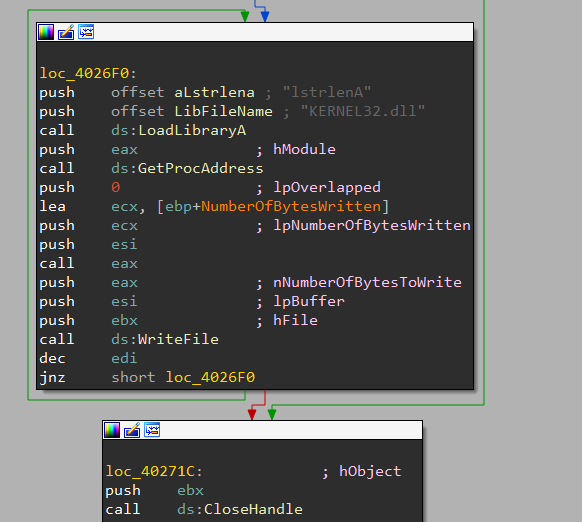
The malware will copy itself (in its packed form) to the designated persistence file path and write the registry run key:

After dropping the file in the persistence location, it will also attempt to randomly modify the contents of the newly dropped payloads to alter the file hash by appending a random number of ‘.’ characters at the end of the file.:
3.3 Mutex
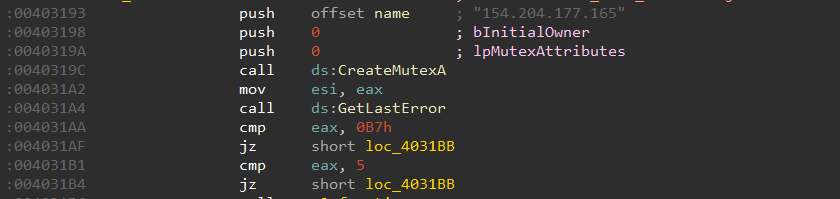
The malware uses the botnet controller’s IP address or domain name (in this case, 154.204.177.165) to create a mutex. This mutex helps prevent multiple instances of the malware from running at the same time:
3.4 Self-Delete
Once the malware copied itself to a new location, it executes the newly dropped file and then deletes itself before terminating. The command used for self-deletion is as follows:
C:\WINDOWS\system32\cmd.exe /c del <original_file_path> > nul
3.4 Command and Control
3.4.1 Client Hello
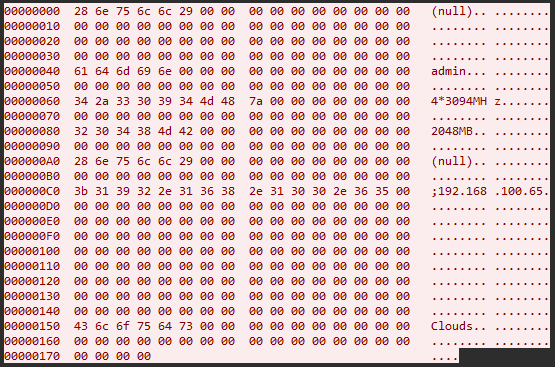
Each time the malware runs, it sends “client hello” messages to the botnet controller to identify itself and fetch commands. This message consists of exactly 372 bytes of user name and system information. Below is the structure I identified based on my analysis:
struct client_hello
{
  char os_version[64];
  char username[32];
  char cpu[32];              //format: %d*%dMHz
  char ram[32];              //format: %dMB
  char reserved[32];         //"(null)"
  char local_ips[144];       //delimiter: ';'
  char reserved_cloud[36];   //"Clouds"
};
Here is an example of a client hello message:
The malware is capable of detecting only certain versions of Windows:
Windows 8
Windows 7
Windows Vista
Windows XP
Windows NT
Windows 2008
Windows 2003
Windows 2000
(null)
It appears that the author of the malware utilized or copied outdated code to detect Windows versions.
3.4.2 C2 Control Codes
The C2 command expected from the botnet controller consists of a control code followed by a command body. Based on my analysis, I have created the following structures:
struct c2_command
{
	int32_t control_code;
	command_body cmd_body;
}

struct command_body
{
	char    target_addr[128];         //domain or IP address of target
	char    http_target_resource[64]; //only used for http DoS attacks
	int32_t target_port;
	int32_t cmd_dos_code;
	int32_t num_dos_thread;
	int32_t cmd_timeout;            //in minutes
	int32_t min_payload_size;
	int32_t max_payload_size;
	u_long activate_cfg;            //(0 or 1) only used for raw socket DoS attacks
	u_long cfg_min_payload_size;    //only used for raw socket DoS attacks
	u_long cfg_max_payload_size;    //only used for raw socket DoS attacks
}
The bot supports five control codes: 49, 1, 2, 3, and 4.
Control Code: 49 (or “1”)
This control code is used to obtain the status of the bot. When the bot receives this control code, it sends a status response packet that is exactly 372 bytes in size, structured as follows:
struct avaialable_response
{
  char reserved_1[320];
  char reserved_2[16]; // "NULL"
  char reserved_3[32];
  int32_t available;   // 0: busy or 1: available
};
Control Code: 1
This control code requests the bot to carry out a DoS attack command. The bot will parse the command body and execute a DoS attack on the specified target until the timeout period expires. Details regarding the supported DoS commands will be provided in a separate section later in this blog.
Control Code: 2
This control code allows the bot controller to force the bot to stop the current DoS attack before the timeout.
Control Code: 3
This control code is used to update the Config.ini configuration file located in the bot’s persistence folder. The content of this configuration file is constructed as follows:

Control Code: 4
This control code returns the current Config.ini configuration file to the botnet controller.
3.4.2 DoS Commands
Each DoS commands provide a number of DoS threads to create. The thread actors can control the number of threads to avoid suspiciously slowing down the victim’s computer and eating up their Internet bandwidth:
Each DoS command specifies a number of DoS threads to create. Threat actors can control the number of threads to avoid excessively slowing down the victim’s computer or consuming their Internet bandwidth:
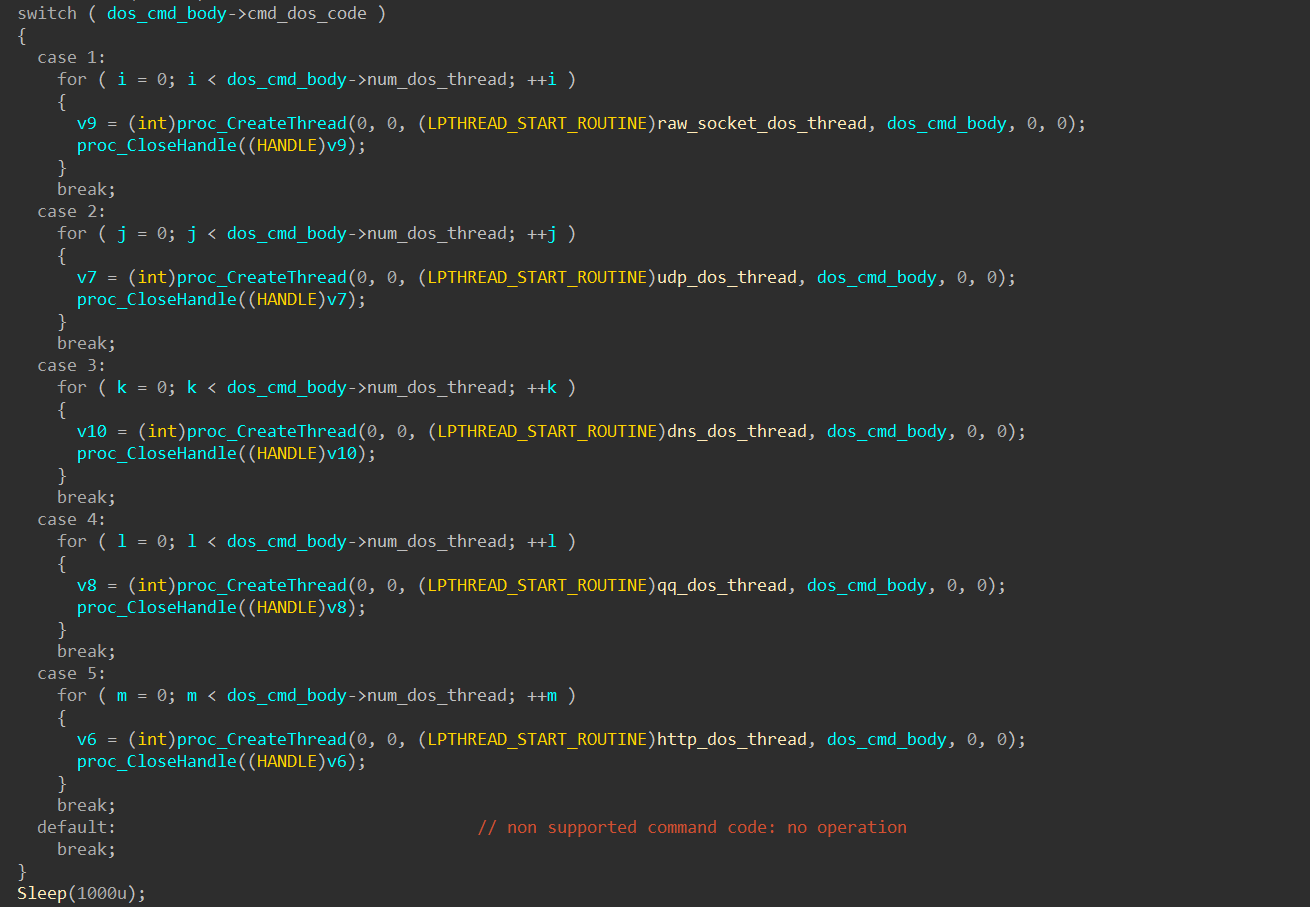
The botnet currently supports five protocols:
cmd_dos_code == 1: Raw socketcmd_dos_code == 2: UDPcmd_dos_code == 3: DNScmd_dos_code == 4: QQcmd_dos_code == 5: HTTP.
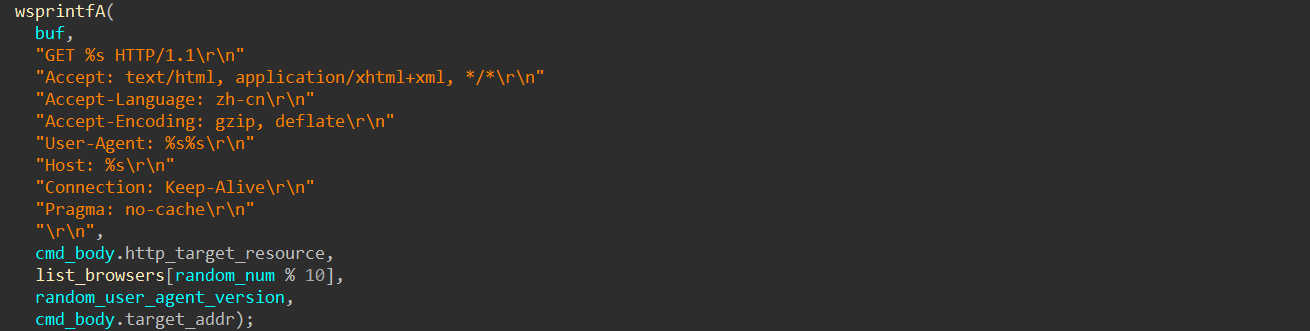
The HTTP headers used in HTTP DoS attacks are constructed as follows:
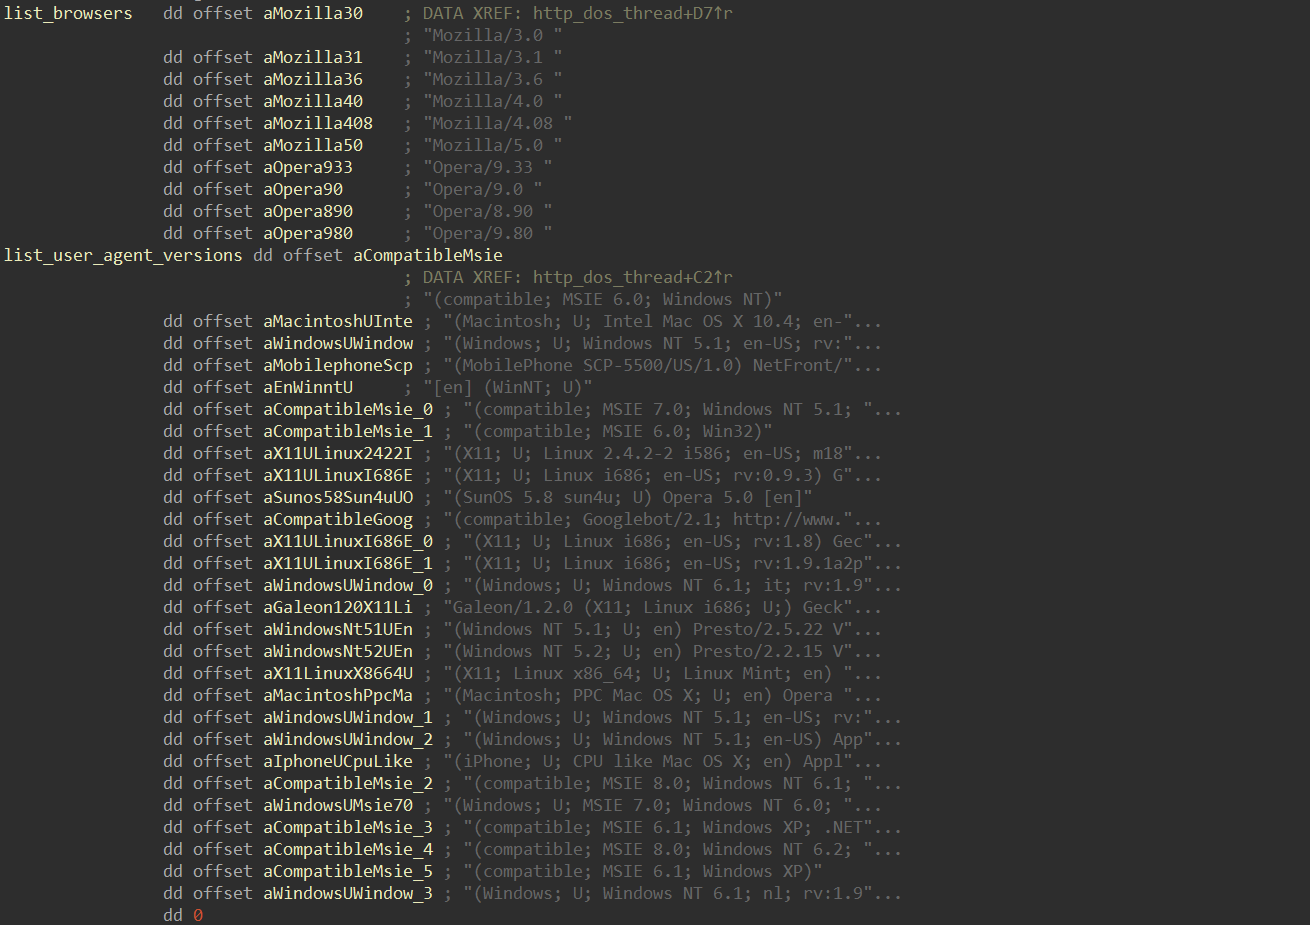
The User-Agent string for each HTTP request is randomly selected from the lists provided below:
The content of the QQ text message used for the DoS attack is as follows:

Perhaps the malware author could have selected a more polite QQ text message for their DDoS campaigns!
4. Closing
The Indicators of Compromise (IOCs), along with in-depth analysis and reverse engineering results provided in this blog, are more than sufficient for you to create both host-based and network-based detection rules. I encourage you to experiment with that, and I may add detection rules later if there are requests.