Reverse Engineering Made Easy: Operand Offset Structs in IDA
2024-05-06
Struct, short for structure, is an important concept in many programming languages. A struct can contain different variables, each of which can be a different data type. Struct allows programmers to group many fields into a structured group for easier processing, storage, and access. Therefore, structs are used in almost all applications.
1. Struct in C and x86
Below is an example of a struct defined in C:
struct Student {
    char *name;
    int age;
    float height;
};
Unfortunately, compilers will discard the struct definitions, and you will only see the offsets being used (added to a base address) instead of field names when disassembling a compiled program. The example below is a compiled snippet that assigns values to the fields name, age, and height of struct Student. Pay close attention to the register eax, which is used as a base address, and the offsets values added to eax:
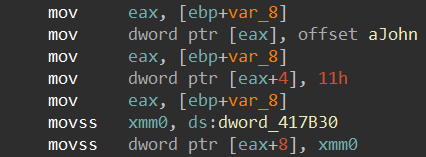
The readability of the disassembled code above is low since you have to make sense of the offsets each time you read it.
Luckily, we can transform the code to something similar to the code below using operand offset structs in IDA:
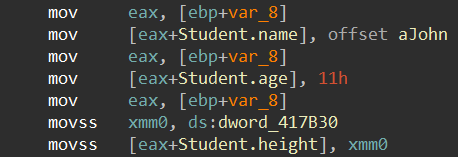
To make it even more interesting, I will analyze the shellcode presented in my previous blog (A Simple Windows Shellcode) to showcase the power of operand offset structs. Let’s go!
2. IDA Tips
What is our goal? - We want to turn the assembly code below into something easy to read and understand. (This is a portion of the shellcode from A Simple Windows Shellcode, loaded to IDA)
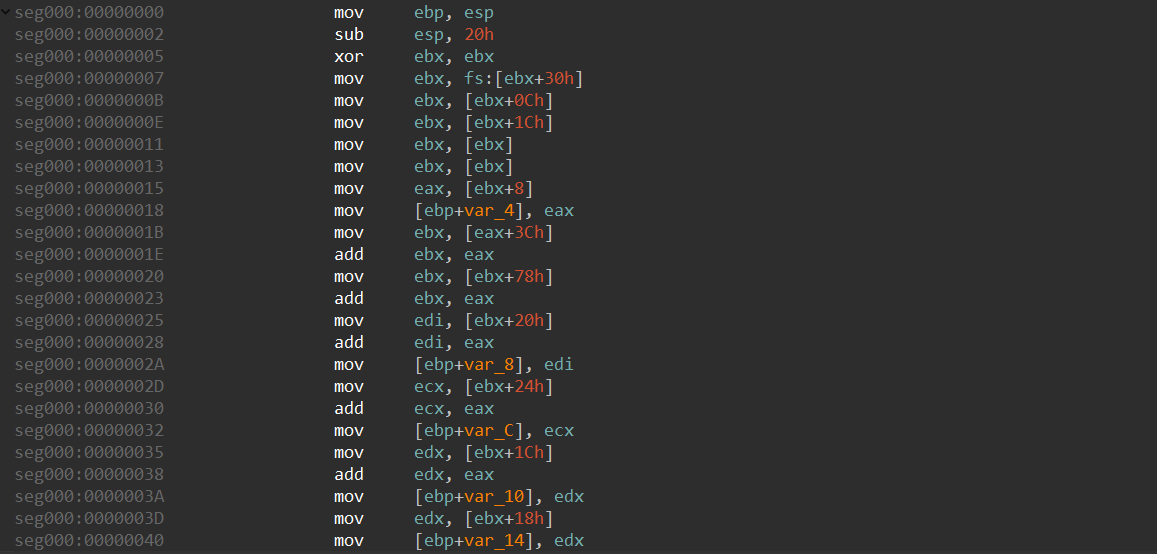
This section presents the steps to label the offsets in the shellcode.
2.1 Loading Related Type Information Libraries
The first step to label the offsets is obtaining the information about the structs being used. You can create structs by referencing documents from Windows. However, IDA comes with some useful type libraries, which are a great time saver.
To add a type information library in IDA, follow:
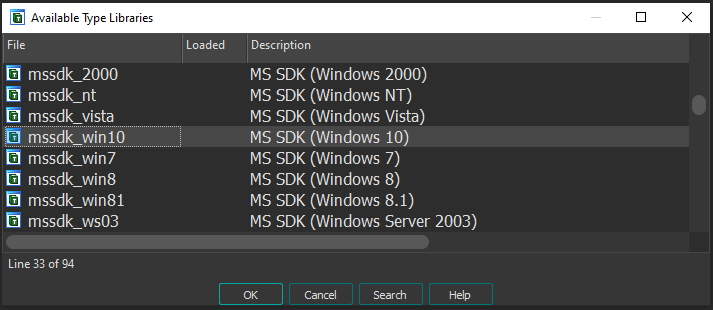
View --> Open subviews --> Type libraries (Shift + F11), and then press the key INS on your keyboard to load type libraries. Choose the type library you need from the Available Type Libraries window. mssdk_win10 is the type library you need to analyze the shellcode:
2.2 Adding Structures
A type library contains many structure definitions, but IDA will not automatically import all the structures after you add a type library. You will need to add the specific structures you want to use manually.
To add a standard struct:
View --> Open subviews --> Structure (Shift + F9). Then press the key INS on your keyboard, and choose Add standard structure
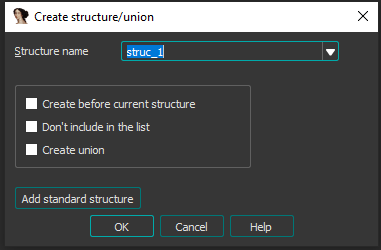
A window will pop up and allow you to choose the structs you want to add:
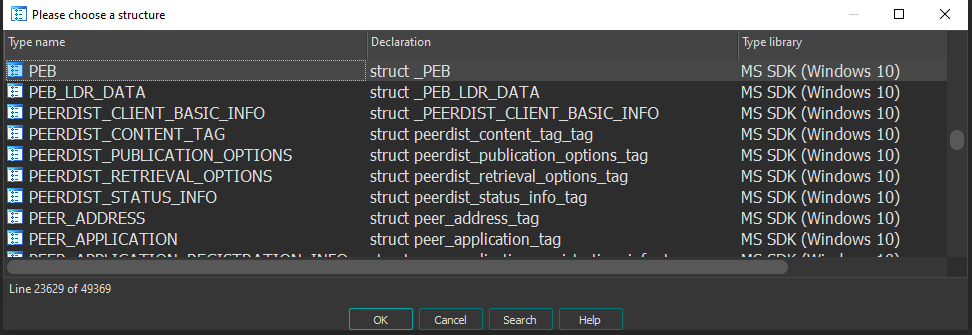
You will need to add the following structs to label the offsets in the shellcode:
PEBPEB_LDR_DATAIMAGE_DOS_HEADERSIMAGE_NT_HEADERS32
2.3 Applying Operand Offset Structs
This is the most exciting part. Once you added the struct definition into IDA, you can use them to label the offset structs.
Click or move the text cursor to the offset you want to label, and:
Edit --> Operand type --> Offset --> Offset (struct)... T
A small window will pop up and allow you to Choose a structure offset:

In the example above, the offset 0x0C corresponds to different fields in a couple of structs (There could be more if you added more structs). It is important to have knowledge about which struct to use. If you read the blog about the shellcode, you will understand why I chose PEB.Ldr. If you still have questions, It’s a good idea to revisit the blog for clarification (Here).
Take a look at how nice the label is:

You can now repeat the steps above to label all the other offsets in the shellcode. The result will look something like the picture below:
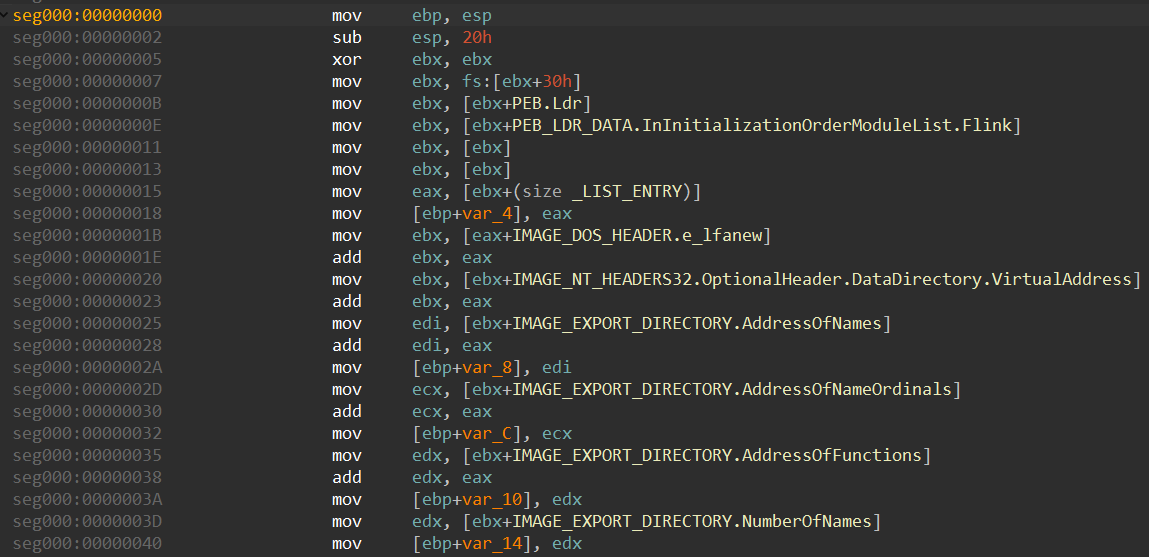
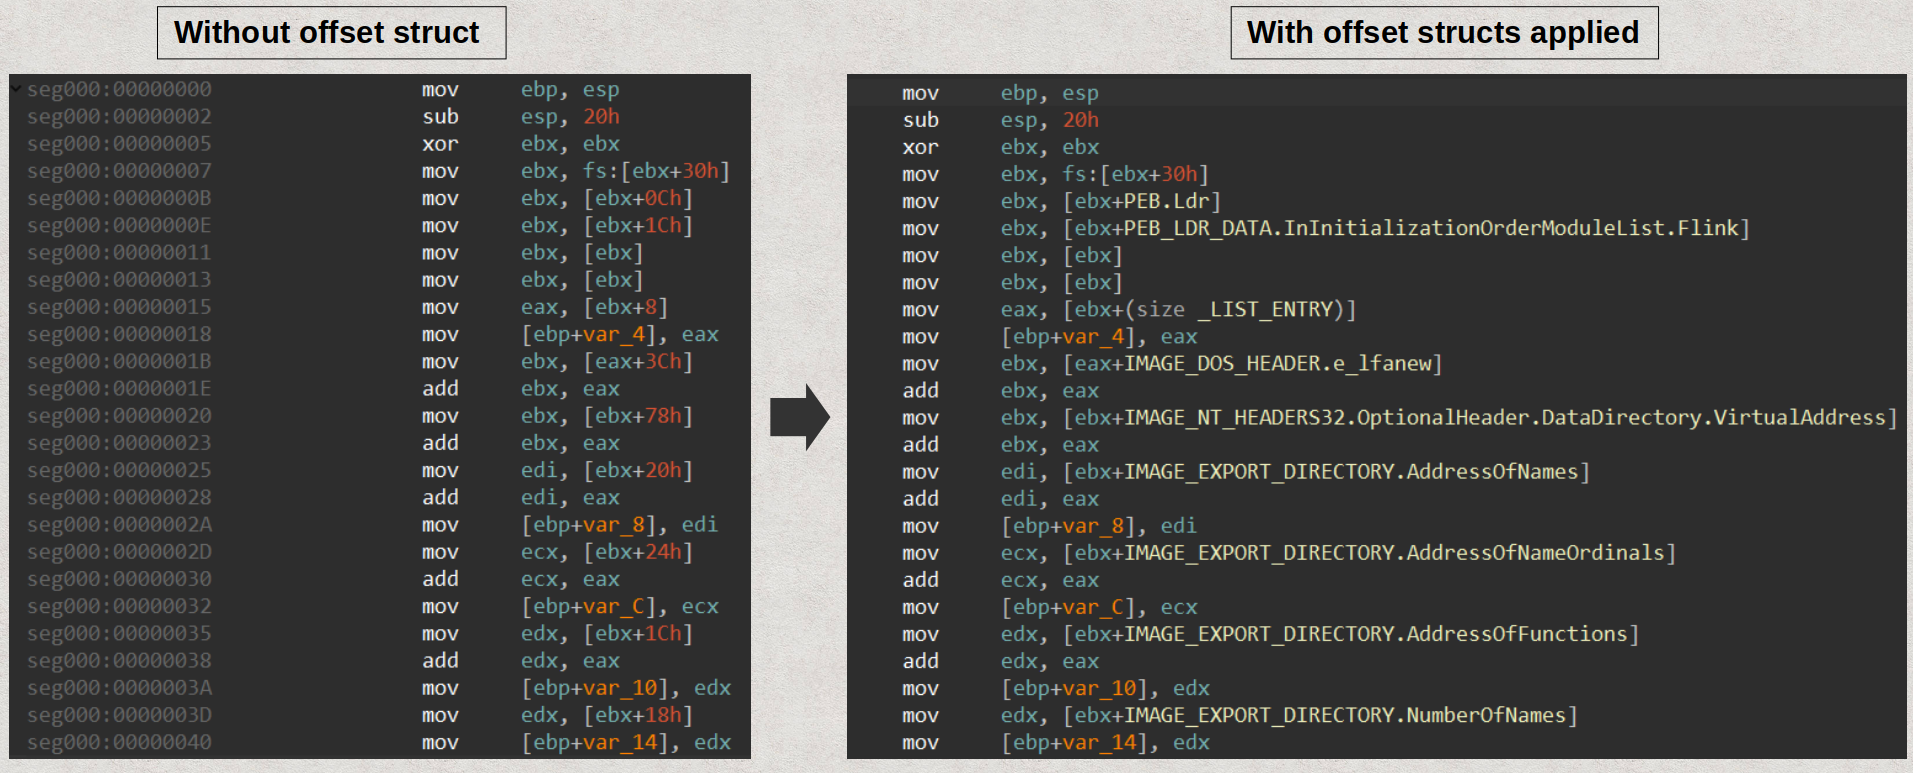
Congratulations! The shellcode is now much easier to read and understand thanks to the labelled fields. This improvement will also save your brainpower, allowing you to focus on the bigger picture when reverse engineering:
3. Homework
I know homework sucks, and you are not even my student. But look at the Student struct I mentioned at the beginning of this blog. I don’t just name it Student for nothing!
All jokes aside, you can compile a small C/C++ program that uses the struct Student and add the struct’s definition into IDA to label the offset structs to get a result similar to what I showed in the first section of this blog.
I hope you enjoyed reading this blog as much as I enjoyed writing it!
